
Smart doorbell
|
Smart doorbell
As part of an ongoing home automation project I attacked our front door bell.
For this I used a very nice smart ESPHome based doorbell developed by Marcel Zuidwijk.
Installation
Marcel’s doorbell is controlled by ESPHome firmware, something I am not familiar with. Almost all of my devices are using Tasmota firmware, so the first step was to reflash the doorbell with Tasmota.
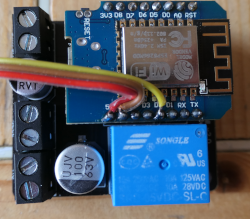
The doorbell is equipped with a Wemos D1 mini board which makes flashing easy. Just connect the board to the PC using a standard USB cable, and use one of the documented methods to flash. Using the base variant of the Tasmota firmware is always good; I chose the sensors variant since I intend to add additional sensors to the Wemos board in the future.
Configure WiFi and MQTT as usual.
The GPIO pins used by the doorbell are GPIO5 (D1) for the relay, and GPIO14 (D5) for the switch. The configuration template for this setup is
{"NAME":"Doorbell V2.0","GPIO":[1,1,1,1,1,224,1,1,1,1,160,1,1,1],"FLAG":0,"BASE":18}
This is sufficient for the doorbell to function. In this default configuration, when the switch is pressed the relay is activated and the bell rings. When the switch is released the ringing stops. Just like a dumb doorbell.
Home Assistant
The Tasmota integration of Home Assistant will automatically pick up the new device via the MQTT broker.
Ring modes
Dumb mode
In the default setup, the smart doorbell behaves as a dumb doorbell. You push the button and it rings.
You can restore the default mode with the command:
    SwitchMode1 0
    PulseTime1 0
Alternatively, as a single command:
Backlog SwitchMode1 0; PulseTime1 0
Note: SwitchMode and PulseTime have a trailing 1 (digit one, not letter ell) since they apply to switch 1.
Fixed ring time
To improve hearability, I want the bell to ring for a fixed amount of time, regardless how short (or long) the button is pressed. This can easily be achieved by setting the appropriate values for SwitchMode and PulseTime as follows:
    SwitchMode1 13
    PulseTime1 20
As a single command:
Backlog SwitchMode1 13; PulseTime1 20
SwitchMode1 13 means that the switch is used in pushbutton mode, pressing it turns on, and it switches off after PulseTime. PulseTime is measured in 0.1 seconds, so with a value of 20 the bell will ring for 2 seconds when the button is pressed.
Note: This is autonomous and will work even if there is no connection to Home Assistant.
Muting
To silence (mute) the bell use the following command:
SwitchMode1 15
This setting disables the switch from controlling the relay. When the switch is pushed, only a MQTT message is sent.
Controlling ring modes from Home Assistant
As already noticed, the doorbell will be detected by Home Assistant (Tasmota integration) as a switch.
To control the ring mode, I defined a helper (Configuration > Automations, Helpers tab), an input_select entity input_select.doorbell_mode with values: Follow, 1 Sec, 2 Sec and Mute. To connect this entity to the doorbell, an automation is used:
alias: Doorbell Mode
description: ''
trigger:
  - platform: state
    entity_id: input_select.doorbell_mode
condition: []
action:
  - service: mqtt.publish
    data:
      topic: cmnd/doorbell/json
      payload_template: |-
        {% if trigger.to_state.state == 'Mute' %}
        {"SwitchMode1":"15"}
        {% elif trigger.to_state.state == '1 Sec' %}
        {"SwitchMode1":"13","PulseTime1":"10"}
        {% elif trigger.to_state.state == '2 Sec' %}
        {"SwitchMode1":"13","PulseTime1":"20"}
        {% else %}
        {"SwitchMode1":"0","PulseTime1":"0"}
        {% endif %}
mode: single
You can use the input_select.doorbell_mode entity in automations, for example to mute the doorbell depending on time of day or whatever tickles your fancy.
An example of a nice integration into an entities card on the dashboard:
type: entities
title: Hal
state_color: true
entities:
  - entity: switch.doorbell
    type: custom:multiple-entity-row
    name: Voordeurbel
    icon: mdi:doorbell
    state_color: true
    entities:
      - entity: input_select.doorbell_mode
        name: false
This looks like this:
Adding a sensor
Since I already had a DHT22 temperature sensor near the location where the smart doorbell is going to be placed, I moved this sensor to the Wemos D1 card of the smart doorbell.
For this, I soldered three wires to the board: 5V, Ground and D2. The DHT22 can run with 3.3V but 5V provides more stability especially when using long cables.
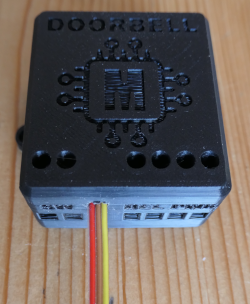
It almost feels a sin to make a hole in the nice case...
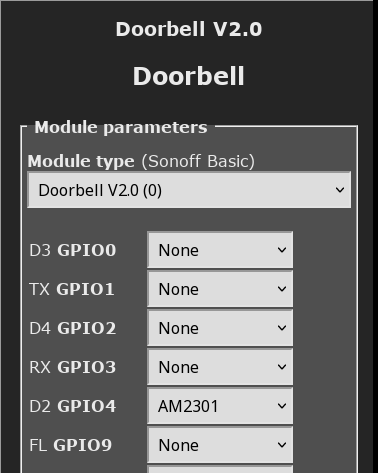
Configuring the sensor. The DHT22 is seen as an AM2301.
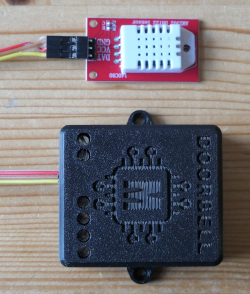
Ready with sensor.
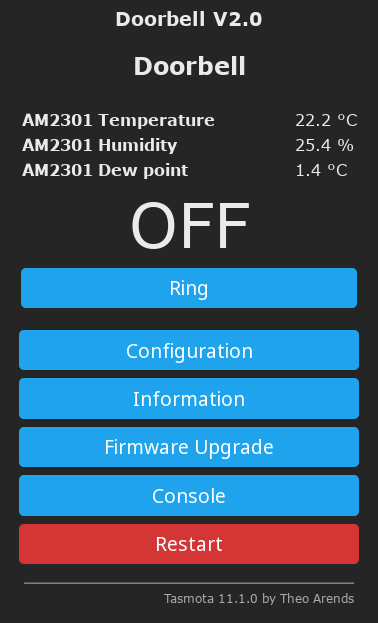
The tasmota home screen of the doorbell.
Using the bell for other purposes
Now the button press is available in Home Assistant, we can do fun (or serious) things when someone pushes the bell button.
Playing a jingle
Often, when we are listening to a CD in the living room, we do not hear the bell signal in the hall.
CDs are played on our sound system using the Logitech Media Server (LMS) and a SquezeBox player. LMS has a plugin ‘LMS Announce’ that allows a sound file (jingle) to be played that interrupts the current CD, which resumes after the jingle is completed. Moreover, this can be controlled via an HTTP command to LMS. Automating this from Home Assistant is fairly trivial:
automation:
- id: Automation__Doorbell_Notification
  alias: Notify Doorbell
  description: ''
  trigger:
  - platform: state
    entity_id: switch.doorbell
    to: "on"
  action:
  - service: shell_command.dingdong_picky
    data: {}
  mode: single

shell_command:
  dingdong_picky: >-
    curl 'http://lms.squirrel.nl:9000/plugins/LMSannounce/js.html?cmd=announceFile&file=%2fSounds%2fWestminster-chimes-doorbell.mp3&playerid=80%3a1f%3a02%3ac2%3a37%3a7d'
Activate on the heating
In our bathroom we have an extra heating to make it comfortable. My wife is handicapped and gets daily home care.
I have connected the heating switch to the doorbell. When the nurse presses the bell button the heating switches on and by the time she and my wife enter the bathroom it is comfortably warm.
There is an input boolean that ‘arms’ this mechanism, to prevent the heating from being activated by accident.
input_boolean:

  badkamerverwarming_on_doorbell:
    name: Switch on badkamerverwarming on doorbell
    icon: mdi:doorbell

automation:

  - id: Automation__Doorbell_Switch_On_Badkamerverwarming
    alias: Doorbell Switches On Badkamerverwarming
    description: Turn on badkamerverwarming when the doorbell is pressed.
    mode: single
    trigger:
      - platform: state
        entity_id:
          - switch.doorbell
        to: "on"
    condition:
      - condition: state
        entity_id: input_boolean.badkamerverwarming_on_doorbell
        state: "on"
    action:
      - service: switch.turn_on
        target:
          entity_id: switch.badkamer_verwarming
      - service: input_boolean.turn_off
        target:
          entity_id: input_boolean.badkamerverwarming_on_doorbell
© Copyright 2003-2024 Johan Vromans. All Rights Reserved.
articles/tasmota_doorbell/index.html last modified 09:43:11 09-Feb-2024